Contact Adhesive Application Instructions
Products This Application Guide Applies To
These instructions apply to these products:
• Flexwood®
• Flexwood® Extra
• Flexwood® Phenolic Laminate
• Flexwood® WOW
STEP 1: TOOLS & SUPPLIES
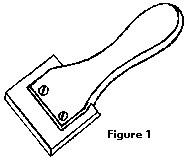
A Flexwood® scraper, or the equivalent should be available. Do not use J-Rollers or hammer blocks.
Flexwood scrapers are available from your distributor.
Most contact adhesives work well with Flexwood® Products. Both solvent based and water based adhesives are acceptable. We recommend using a roller grade adhesive and following the manufacturers instructions precisely.
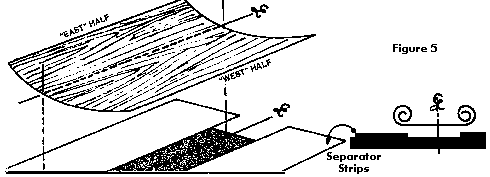
Have on hand a supply of bare, 1/8″ hardboard separator strips. The separators need to be long enough, and enough of them to completely cover the area coated with contact adhesive. Two separators, half the width of the substrated may be used, but using multiple separators about 6″ wide will make it easier to slip and remove them as you make contact across the panel.
Contact adhesive adheres on contact. Do not attempt to install Flexwood® without separator strips.
STEP 2: VENEER & SUBSTRATE PREPARATION
1) Acclimate substrates and Flexwood® products for 48 hours.
2) Determine how many coats of adhesive the substrate will require. Porous substrates will require two coats.
3) Lay out Flexwood® products and allow them to relax. Boards or panels may be used to flatten sheets, showing any curl.
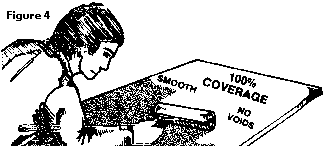
4) Coat both substrate and back of Flexwood® with a smooth layer of contact adhesive.
We recommend rolling. If adhesive is sprayed, it must coat 100% of both surfaces. Make sure you honor manufacturers Instructions concerning open time.
Adhesive coverage is the key element in successful application of Flexwood® products.
Some fullness or curl is normal in Flexwood® products. Fully acclimating sheets under weight will reduce this situation. Because tight grain woods such as Maple are most susceptible to curl caused by moisture, they will require close attention. When covering large panels, use the centerline method outlined below.
STEP 3: VENEER APPLICATION
Apply Flexwood® to substrate!
Do not attempt to start on one edge of a wide panel. Use the centerline method of applying the sheet to the substrate. (See the drawing above) • Lay out separator strips on substrate.
1) Make initial contact down the centerline of the sheet and substrate.
2) Grasp the East half of the sheet and pull it taut to remove any fullness.
3) Lower the tightly stretched sheet and move the separator strip away from the centerline.
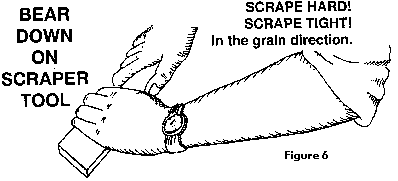
4) Using the Flexwood® tool, scrape the contacted area hard to bond the two adhesive surfaces.
5) Repeat the process for the West half.
6) Using your body weight and both hands to exert maximum pressure through Flexwood® into the adhesive, scrape the entire panel again with the Flexwood® scraper.
The Flexwood® scraper is designed for joining surfaces with contact adhesive. The edges are square cut. Do not relieve these edges by rounding them. The square edges insure maximum pressure for the best possible bond.
STEP 4: INSPECTION & FINISHING
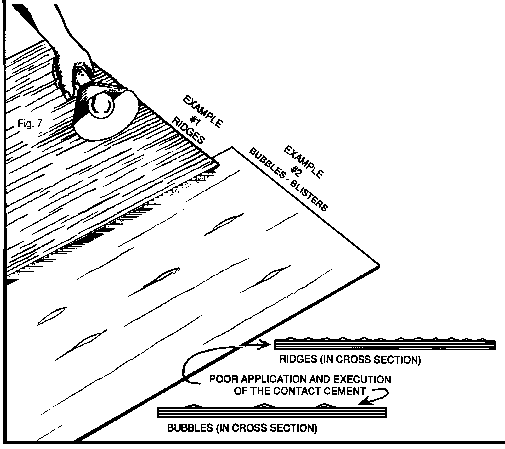
Inspect the panel by shining a light across the grain. (See frame below) Insure that any problems are corrected prior to proceeding.
Types of Bond Problems
Ridges
Ridges result from inadequate adhesive coverage or adhesive manufacturers drying time is not being honored. Adhesive that is not dry allows the veneer to expand across the grain to form ridges in the grain direction, and generally all across the face. Allow adhesive to fully dry. If adhesive has legs when sheet is pulled off substrate, adhesive was not fully cured before bonding.
Bubbles
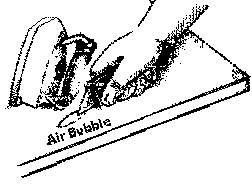
Bubbles occur as a result of lack of adhesive or insufficient pressure applied during application. Using J-rollers will generally result in bubbles. Use Flexwood® scraper to make bond. Overlap strokes. Finishing materials or high moisture conditions will cause veneer to expand. Areas of marginal bond will pop up into blisters. Slit the blister and check for adhesive coverage.
Ironing bubbles
If iron is used to repair bubbles, place a piece of Kraft paper between the iron and veneer to keep from scorching surface. Keep iron moving.
Sanding
Sanding the veneer on Flexwood® is very thin. Excessive sanding may result in sand through. Do not use any grit coarser than 150. Use one thickness of sandpaper with fingertips.
Finishing
Most finishing materials are suitable for use on Flexwood® products. It is however vary important that all finishing materials be tested for appropriate results. Water based finishes will cause veneer to try to expand. It is vital that the bond is well executed.
Touch up
Fillers such as Star, Mohawk and Famowood may be used to fill small voids in the surface of Flexwood® products. These fillers work best if thinned with lacquer thinner to a syrupy consistency and sanded while still wet.
Bubbles may be repairable. Slit in grain direction, and heat with a warm iron to reactivate adhesive. If adhesive coverage is scant the bubble will not adhere.
CAUTION
IT IS THE SOLE RESPONSIBILITY OF THE INSTALLER TO TEST AND DECIDE IF THE SUBSTRATE IS SUITABLE FOR THE APPLICATION.
Adhesive
•Apply adhesive in a smooth solid coat.
•Apply full wet coat over 100% of both surfaces.
•Apply two coats on any porous substrates.
•Honor all working times set by adhesive manufacturer.
•Check with your adhesive manufacturer before using PVA adhesive with Flexwood® products.
•Sand the back of Flexwood® to enhance the bond of PVA adhesives.
Substrates
Do not attempt to apply Flexwood® products to the following substrates:
•Sheet rock, or drywall
•Any exterior surface
•Plastic laminate or melamine board
•Spiral wound cardboard tubes
Apply two coats of contact adhesive to porous substrates.
Application
•Always use the centerline technique to start application
•Acclimate the Flexwood® products and the substrate before application
Pressure
You must apply all possible pressure with a narrow rigid scraper.
•Do not use J-Rollers
•Do not use hammer blocks
•Scrape twice
Wood expands with moisture! Weak bonds will allow Flexwood® to expand in the presence of moisture. This will invariably result in ridges or blisters.
Flexible Materials Inc. presents these application instructions as suggestions based on our experience with this product. However, due to varying procedures and conditions, this information is given without obligation or warranty. We recommend that thorough testing of this product, adhesives and finishing materials be completed prior to final application.
Flexible Materials only warrants the quality of our products. We have no control over the use and processing of Flexwood products therefore the application is exclusively the responsibility of the user. In the event of any claim, Flexible Materials liability will not exceed the value of the Flexwood products purchased from Flexible Materials or an authorized distributor.

